In this Devops Project we are using Github as SCM, Maven as a build tool, Sonarqube as a code quality test tool, Jenkins as a CI and CD tool...
In this Devops Project we are using Github as SCM, Maven as a build tool, Sonarqube as a code quality test tool, Jenkins as a CI and CD tool, Docker as a containerization tool, and AWS as a cloud platform.
Before Starting the Jenkins Project we need to set up the Ec2 instance with min 8GB of RAM. Inside the Ec2 instance need to install Jenkins. Install docker and run the sonarqube as a container.
Step1: Install the jenkins using the below URL
https://www.jenkins.io/doc/book/installing/linux/
Commands for installing jenkins in Amazon-Linux:
sudo wget -O /etc/yum.repos.d/jenkins.repo https://pkg.jenkins.io/redhat-stable/jenkins.repo
sudo rpm --import https://pkg.jenkins.io/redhat-stable/jenkins.io-2023.key
sudo yum upgrade
sudo yum install java-17*
sudo yum install jenkins
sudo systemctl daemon-reload
systemctl enable jenkins
systemctl start jenkins
systemctl status jenkins
Install git and generate the private and public keys for the jenkins user. If you have already installed and configured the jenkins skip the above step.
After installing and starting the jenkins add 8080 and 9000 ports in inbound rules and start configuring the jenkins.
Step2: Install the docker using the commands
Commands:
yum install docker
systemctl enable docker
systemctl start docker
systemctl status docker
Step3: Pull the Sonarqube Docker images and run the sonarqube docker container
Commands:
docker run -d -p 9000:9000 sonarqube:lts-community
docker ps
Step4: Install the required plugins
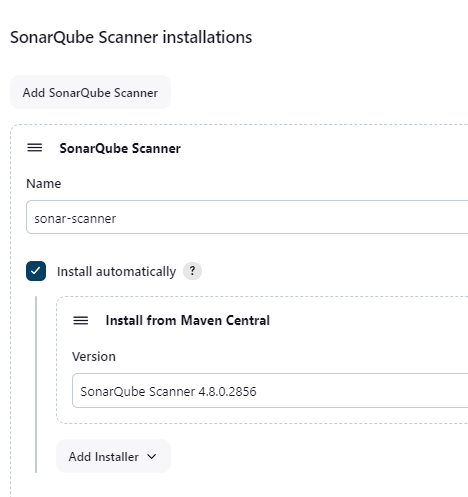
Manage jenkins → plugins → Search Jdk → choose Eclipse Temurin installer and openJDK-native-plugin, SonarQube Scanner, and click install
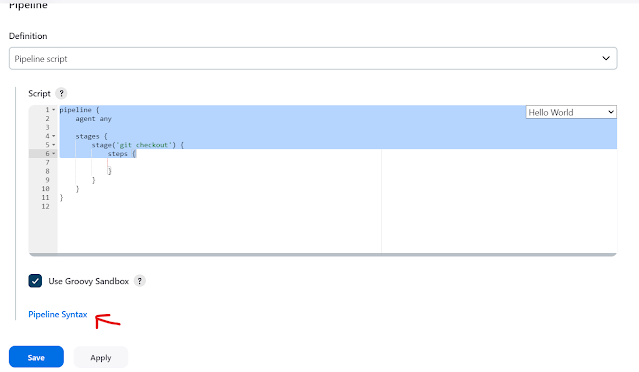
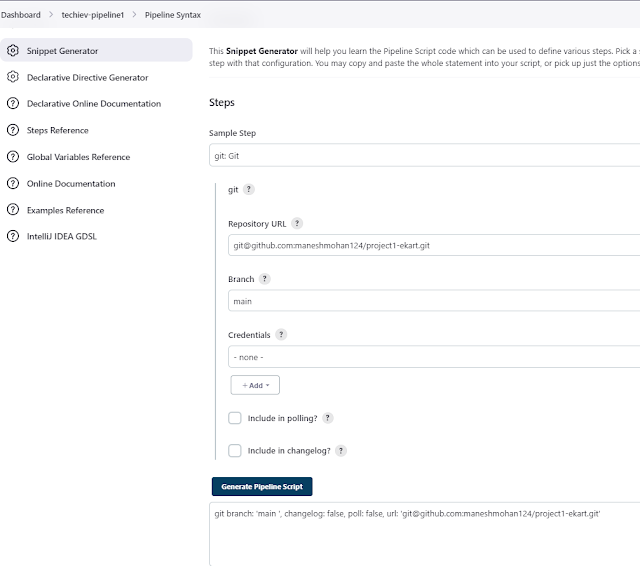
Copy the generated script and paste it into the pipeline.
For compilation(build tool), we need to use Maven for that we need to add our tools before the stage ”git checkout”.
Add another stage called compile and inside the steps we need to add the maven compile step.
Now we need to add a third stage, the third stage is “sonarqube Analysis”.
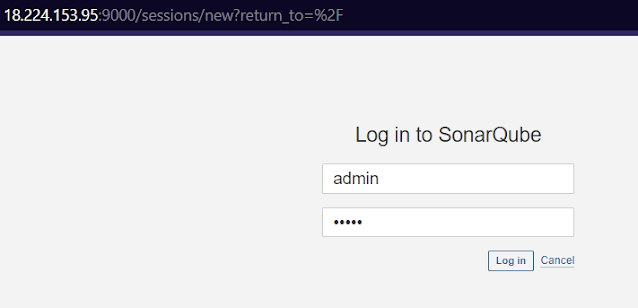
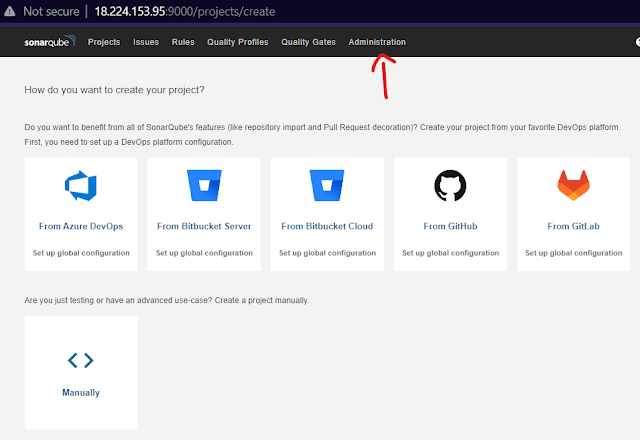
Click Administration → click Security → users → click = under the tokens → enter the token number as 1 and click Generate.

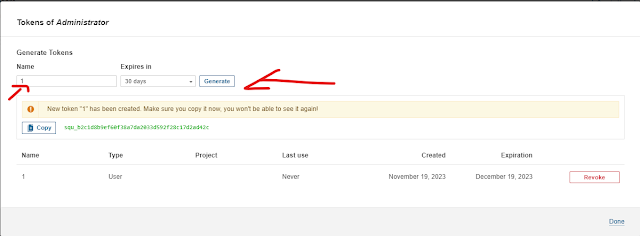
In the third stage, we need to add the below lines
stage('Sonarqube Analysis') {
steps {
sh ''' $SCANNER_HOME/bin/sonar-scanner -Dsonar.url=http://18.224.153.95:9000/ -Dsonar.login=squ_b2c1d8b9ef60f38a7da2033d592f28c17d2ad42c -Dsonar.projectName=shopping-cart \
-Dsonar.java.binaries=. \
-Dsonar.projectKey=shopping-cart '''
Here → Dsonar. url we need to give the sonarqube url
Dsonar. login we need to give the sonarqube token
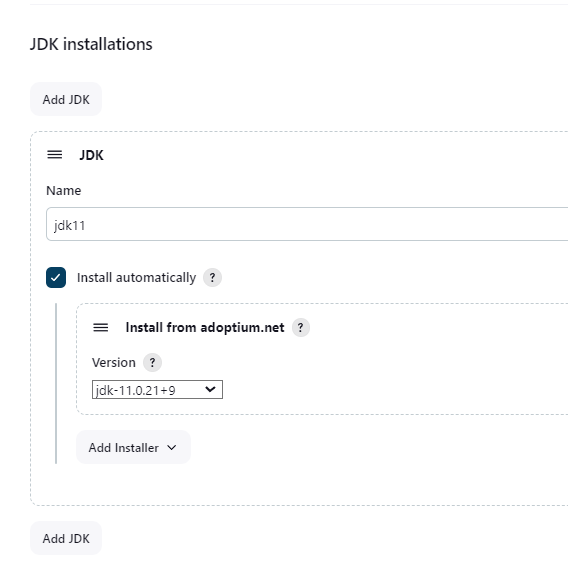
For Maven configuration type the name maven, click install automatically and choose version 3.9.2.
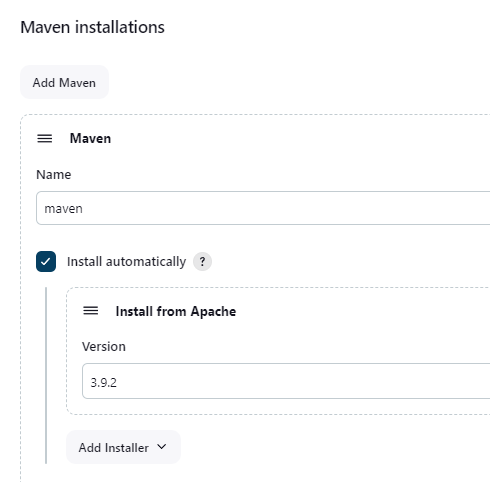
For the sonarqube scanner configuration, type the name sonar-scanner click install automatically choose version 4.8.0 click apply, and save.
 Now run the pipeline it took some time to build and wait for some time to finish all the stages.
 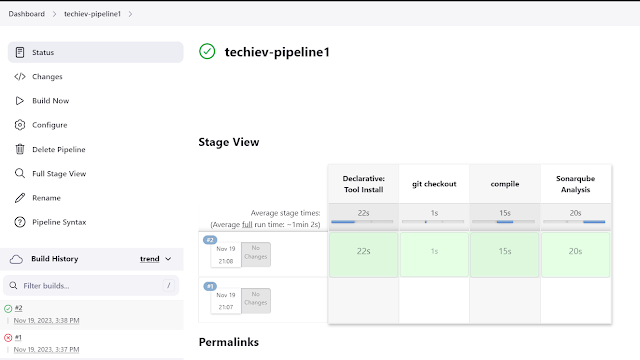 Once the pipeline is successful you can able to check the code quality test result in the sonarqube.
Login to the sonarqube and click the project you can able to find your project name called shopping-cart.
 Now we need to build the application as a docker image, we need to add another stage for building the application and create the docker image.
Before doing the pipeline changes we need to install the below plugins.
Search docker and install the plugin name called Docker, Docker Pipeline, docker-build-step, CloudBees Docker Build and Publish
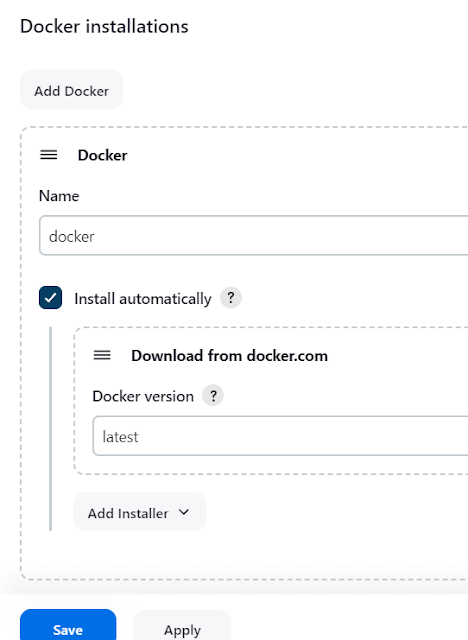
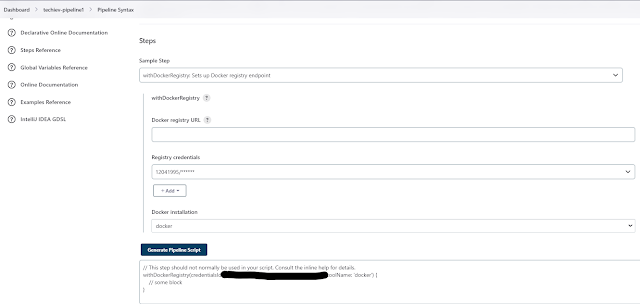
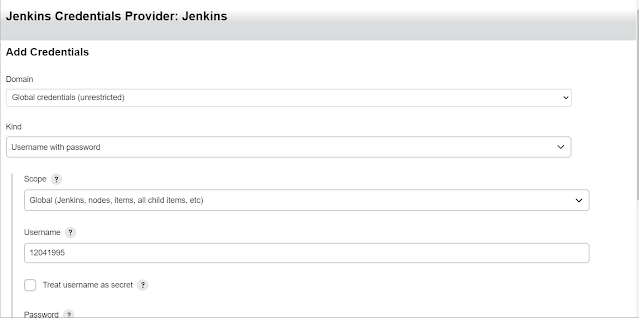
Now we can use that syntax in the pipeline job and add the build, tag, and docker push commands inside the pipeline.
stage('Build & Push Docker Image') {
steps {
script{
withDockerRegistry(credentialsId: '*********************', toolName: 'docker') {
sh "docker build -t shopping:latest -f docker/Dockerfile ."
sh "docker tag shopping:latest 12041995/shopping:latest"
sh "docker push 12041995/shopping:latest "
}
}
}
}
Once the Jenkins pipeline is successful, we can check our Dockerhub for the Docker images.
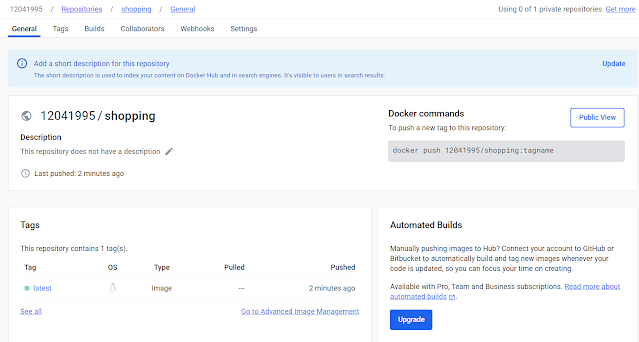
Inside the Jenkinsfile just add the stage called Docker deploy to container and add the below steps. Under the script copy from the previous pipeline Build & Push Docker Image stage.
stage('Docker Deploy to Container') {
steps {
script {
withDockerRegistry(credentialsId: '96832a6f-5f6f-45ca-93b4-118281d51ece', toolName: 'docker') {
sh "docker run -d --name shopping-cart -p 8070:8070 12041995/shopping:latest " }
}
}
}
Now check the pipeline and see all the stages are green and in a successful state. Once deployment is completed we can able to check the application using port 8070 before that we can find our application container inside the server.
 The application container was running now we need to add an 8070 port in the AWS ec2-instance’s inbound rules and run the url →http://publicip:8070 in the browser
Now final Pipeline looks like this below
pipeline {
agent any
tools {
jdk 'jdk11'
maven 'maven'
}
environment {
SCANNER_HOME= tool 'sonar-scanner'
}
stages {
stage('git checkout') {
steps {
git branch: 'main ', changelog: false, poll: false, url: 'git@github.com:maneshmohan124/project1-ekart.git'
}
}
stage('compile') {
steps {
sh "mvn clean compile"
}
}
stage('Sonarqube Analysis') {
steps {
sh ''' $SCANNER_HOME/bin/sonar-scanner -Dsonar.url=http://3.142.76.226:9000/ -Dsonar.login=squ_11c27aa22855c01984109884fc181d3025f7b22b -Dsonar.projectName=shopping-cart \
-Dsonar.java.binaries=. \
-Dsonar.projectKey=shopping-cart '''
}
}
stage('Build application') {
steps {
sh "mvn clean install -DskipTests=true"
}
}
stage('Build & Push Docker Image') {
steps {
script{
withDockerRegistry(credentialsId: '******************', toolName: 'docker') {
sh "docker build -t shopping:latest -f docker/Dockerfile ."
sh "docker tag shopping:latest 12041995/shopping:latest"
sh "docker push 12041995/shopping:latest "
}
}
}
}
stage('Docker Deploy to Conatiner') {
steps {
script {
withDockerRegistry(credentialsId: '96832a6f-5f6f-45ca-93b4-118281d51ece', toolName: 'docker') {
sh "docker run -d --name shopping-cart -p 8070:8070 12041995/shopping:latest " }
}
}
}
}
}


